Resin jewelry is a popular choice for many people because it is versatile, durable, and easy to make. However, one of the challenges of working with resin is polishing it to a high shine. Polishing resin jewelry can be a daunting task, especially for beginners. In this article, we will provide step-by-step instructions on how to polish resin jewelry to a high shine.
Polishing resin jewelry involves several steps, including cleaning, sanding, and polishing. The first step is to clean the resin piece with warm, soapy water to remove any dirt, grime, or mold. After cleaning, sanding the resin piece is necessary to remove any scratches or rough spots. Once the resin piece is smooth and free of imperfections, it is time to polish it to a high shine.
Preparing the Resin Jewelry
1.1 Cleaning the Jewelry
Before polishing resin jewelry, it is essential to clean it properly. Start by washing the jewelry with warm soapy water and a sponge or soft cloth. Make sure to remove any dirt, grime, or mold from the piece before proceeding to sand it. Rinse the jewelry thoroughly with clean water and pat it dry with a towel.
1.2 Sanding the Jewelry
After cleaning the resin jewelry, the next step is to sand it. Sanding helps to remove any bumps or rough spots on the surface of the jewelry. Use a fine-grit sandpaper (400-600 grit) and gently sand the surface of the jewelry in a circular motion. Make sure to sand evenly and avoid applying too much pressure as it can damage the jewelry. Rinse the jewelry with clean water and pat it dry with a towel.
Once the jewelry is clean and sanded, it is ready for polishing.
The video down below from Cole's Creations shows how to sand down your jewelry, however, keep in mind that the artist goes through a more intensive labor sanding process which may not always be necessary for your own jewelry.
If your jewelry pieces have deep scratches or a rough surface, then you might need to follow this more intensive process. But if your jewelry is smooth and doesn't have deep scratches, then a quick sanding like mentioned above should be enough to get it to where it needs to be before the polishing step.
Polishing the Resin Jewelry
Choosing the Right Polish
To achieve a glossy finish on your resin jewelry, choosing the right polish is crucial. There are several types of polishes available, including wax-based, oil-based, and water-based polishes. Wax-based polishes provide a high shine and are easy to apply, but they may not last as long as other types of polishes. Oil-based polishes are durable and provide a long-lasting shine, but they can be difficult to apply and may require more effort to buff. Water-based polishes are eco-friendly and easy to apply, but they may not provide as high of a shine as other types of polishes. Consider the type of resin you are using and the desired outcome when choosing a polish.
Here are some of the most popular polishes that people use to polish resin jewelry.


Applying the Polish & Buffing
Once you have chosen the right polish, it's time to apply it to your resin jewelry to achieve a high shine. Start by cleaning the jewelry with a soft cloth to remove any dust or debris.
Apply a small amount of polish to a soft cloth and rub it onto the surface of the jewelry in a circular motion. Be sure to apply the polish evenly and buff it off using enough pressure on it while buffing. Continue buffing until you achieve the desired level of shine. If necessary, apply a second coat of polish and buff again.
Here is a video that shows how Fran from Little Windows polishes her resin jewelry pieces and other resin pieces using a microfiber cloth and the Flitz Polish.
You can also use a buffing wheel with a Dremel rotary tool to buff the jewelry in a circular motion.
Overall, polishing resin jewelry requires the right polish, careful application, and proper buffing techniques. With the right tools and a little bit of patience, you can achieve a beautiful, glossy finish on your resin jewelry.
Finishing Touches
3.1 Cleaning the Jewelry Again
After sanding the resin jewelry, it's essential to clean it again to ensure that there is no dust or debris left on the surface. Use a soft cloth or brush to remove any dust or debris from the jewelry. You can also use warm water and soap to clean the jewelry, but make sure to dry it thoroughly before moving on to the next step.
3.2 Adding a Protective Coating
Adding a protective coating to your resin jewelry is not necessary but it can protect it from scratches and other damages. There are different types of coatings available in the market, such as epoxy resin, UV resin, water-based polyurethane, or spray-on acrylic or polyurethane varnish.
If you're using resin, mix it according to the instructions provided by the manufacturer and apply it to the jewelry using a brush. You can also use UV resin and a UV light for a faster curing time. Make sure to apply a thin, even layer and let it dry completely before applying another coat.
If you're using polyurethane varnish or spray-on varnish, make sure to apply it in a well-ventilated area and follow the instructions provided by the manufacturer. Apply a thin, even layer and let it dry completely before applying another coat.
Once the protective coating is dry, your resin jewelry is ready to wear or sell.
Alternate Method to Get a High Gloss Finish on Resin Without Sanding
Take a look at the following videos showing an alternate method to give your resin jewelry pieces a high gloss finish without having to sand it down. It really is the easiest and fastest way to get your jewelry pieces nice and shiny.
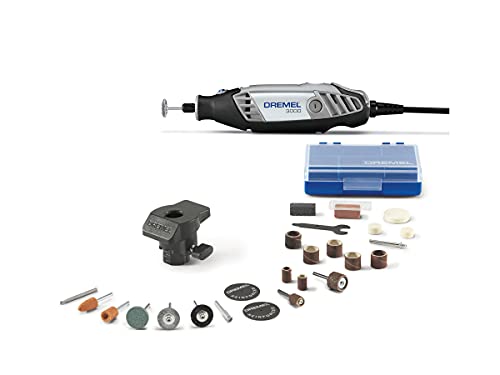
All you need is a rotary tool like this one and a polishing wheel!
Even though these are not videos showing how to polish jewelry, this method works on any type of resin piece.
Here's everything you'll need to create that high gloss shine:

Keep in mind that this method of sanding, polishing, and finishing resin jewelry pieces also works for other types of artwork made with resin. So feel free to use this for any type of resin that is looking dull, matte, cloudy, scratched, or needs just a tiny bit more shine.
I really hope that this tutorial was helpful.
