¿Have you ever heard about Negative Space Acrylic Pour? Well, this type of technique or style of acrylic pouring simply involves pouring your paints on top of a solid color (called negative space) that has already been painted or poured onto the surface previously. This negative space is usually white or black... however, you can use any color you'd like!
So with a Negative Space Acrylic Pour, you create a solid background that contrasts with the other colors and highlights your design.
Unusual Acrylic Pouring Techniques
I once heard a graphic designer talk about the importance of white space. Can you imagine if the whole canvas is full of elements? Well, nothing of what you want to convey would be understood.
So you need to create spaces and establish contrast gaps between shapes and color. As a consequence, your work will be much cleaner and more aesthetic, and your style of composition with acrylic pouring will gain uniqueness.
Let's take a look at 11 different negative space acrylic pour tutorials I found. They all use unusual acrylic pouring techniques which make each acrylic pour painting unique.
Dutch Pour On White Negative Space
The first time I saw a Dutch pour painting, I was very impressed with how the negative space made everything pop. It immediately caught my attention by the balance between the blank areas on the canvas and the dose of colorful paints.
What is a dutch pour painting?
A dutch pour is an acrylic pouring technique that uses air (usually from a hair dryer, an air compressor, or a straw and a good pair of lungs) to manipulate the paints on a canvas. The Dutch pour technique create a unique blend of colors that fade into the background as well as ribbon like edges with cell lacing.
To do this technique, you must first apply a base of white paint on the canvas, and define an area where you will pour the rest of your colors. Then you add to the canvas, one by one, the colors you want in your work of art.
After pouring all the paints onto the canvas, you will add white paint around the edges of your poured paints, as if you were trying to add a white frame. This white paint frame will be moved (gently) over the other colors, with the help of a hair dryer.

Once the white paint is covering part of the other colors, then it is time to bring the painting to life. With the blow dryer and a little more power, apply air pressure to the canvas so that the new paint mixture flows in different directions. Since the white is below and above the colors, an effect is created where the boundaries of the color are blurred into the white.
Take a look at the 2 following Dutch pour painting tutorials to get a more clear understanding of how to use this technique.
Dutch Pour With Black Negative Space
Something interesting about a negative space acrylic pour is that the base is not necessarily white. It can be any color.
Unlike the white pours above, this one gives you greater depth, accompanied by a feeling of mystery and depending on the contrast of colors that you apply, it will reflect more elegance.
The procedure for creating this painting is exactly the same as with the 2 previous Dutch pour paintings, with the exception of the base. In this case, the base will be black instead of white.
Negative Space Acrylic Pouring With Airbrush Technique
In this next negative space acrylic pour tutorial, you will find the airbrush technique.
Like the Dutch pouring technique, this is based on covering the canvas with the negative base, and then lines are drawn with each color separately. Additionally, a white outline is added and air is applied to combine them and direct them in the desired direction.
However, you will notice that the air pressure of the airbrush is much stronger than that of the hair dryer. Therefore, the effect is much more interesting.
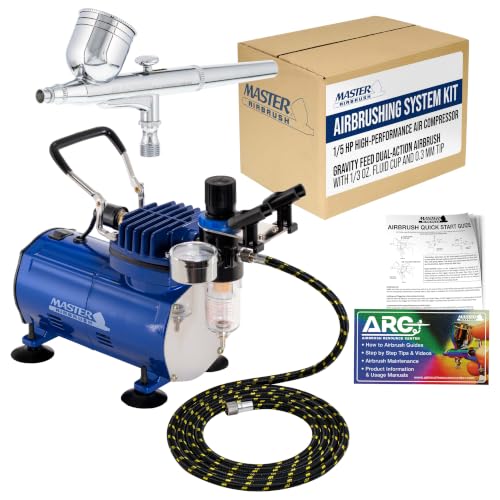
I really love this master airbrush. Has a 6 foot hose and a powerful 1/5 hp single piston quiet air compressor.
Oh, and if you use a negative white space, and apply dark colors and their respective tones for gradients, you can achieve incredible effects.
Take a look at these 2 awesome negative space acrylic pours using the airbrush technique.
Negative Space With Kiss And Blow Technique
The Kiss and Blow technique is fairly simple. It will undoubtedly make you smile when you see the finished piece of work.
It basically follows the same principles as the airbrush technique and the Dutch pour technique. However, this time you will apply air pressure only with the force of your lungs. You will blow air directly into the paint strokes and negative space.
Some people use only their mouths, while others rely on straws to help direct the air. However, the objective is the same... to mix the colors on the canvas with the help of air and to blur the edges with the color of the negative space.
Once you have expanded the mixture of colors, you must use a balloon (of any size) to begin your "kiss" technique. You do this by exerting pressure with the balloon on the painting; And without moving, you just lift up the balloon. This removes part of the paint, leaving an effect similar to that of a kiss on the canvas.
Later you clean off the paint from the balloon and repeat previous the step at different points on the canvas.
Believe me that with bright colors, you will love the result.
Geode Style Dirty Pour On Negative Space
As artists, we are inclined to create and recreate wonders on canvas. Some like to recreate what they see in mother nature.
Among the wonders of mother nature, we have geodes, where minerals of different types crystallize and generate spectacular colors.
A Geode also be part of your art gallery if you want. Just apply this dirty acrylic pouring technique, and of course play with negative space.
What is an acrylic dirty pour?
An acrylic dirty pour is just when you put a bunch of colors into a cup and then pour those colors onto your canvas. It is as simple as that!
In this technique, after covering the base with the negative color, you are going to take a container where you will prepare your dirty acrylic mixture before pouring it onto the canvas. Viewed from above, one half of the container should be the color of your base (in this case, black), and in the other half you add your colors one by one.
Now, for this and many other techniques, the use of metallic paints is very useful. Therefore, if you do not have metallic paints in stock, it may be time to consider purchasing some.
Here are some of my favorite metallic paints!!!


Once you have prepared your paint mixture, pour it onto the canvas in lines. Then tilt the canvas so that they paint covers the areas you want.
Ideally, to achieve the Geode effect, take into account the color palette that occurs with greater intensity in this type of rocks.
Black Negative Space Acrylic Pour With An Open Cup
Another of the best techniques for negative space acrylic pour is the open cup technique. You don't specifically need a cup. You can use any type of container as long as it is hollow in both the mouth and the base.
To begin, you must add the black base onto the canvas and on it place one or more hollow cups. You may even place one cup within another as you can see in the following video. Inside each of the cups you will add your colored paints and eventually add black.
You must consider that around the cup you must also add a dose of black paint. This will depend on how much paint is inside it.
By the time you've finished pouring in the black paint and other colors, you proceed to remove the cups. All of the mixture will flow onto the canvas. Of course, you can use other instruments to move the paint and improve its coverage; just like you are totally free to tilt the canvas for faster flow.
It should be noted that whenever you use a negative base, whether in black or white, you can use the base color to cover some errors... that is, if you consider that some area of the painting has moved too much and you don't like how the paint looks in that area, then you can use the negative color to cover it.Black and White Negative Space Acrylic Pour With Open Cup
The only two differences between this tutorial and the previous tutorial is that we are using a black and white negative space and also dragging the cup across the canvas while being slightly lifted off the surface to the paint flow slowly rather than lifting the cup and letting all the paint flow at once.
Just take a look at the video to see how amazing this turns out!
Black Negative Space Acrylic Pour With Open Cup And Twist Technique
With this open cup and twist technique, you will add each color to the cup, while simultaneously rotating it and moving it across the canvas. That way, the paint on the inside will spread and twist onto your canvas.
You must be careful to not lift the cup too much during each turn, otherwise a lot more paint than you want to will flow onto your canvas. Remember that if you want to fix some areas of your painting, just cover that area again with the color of the negative space.
Floating Cup Acrylic Pour
Unlike the open cup technique, in this case we will use a cup or container that only has one opening.
Now add the negative space color onto your canvas. You can also add the negative space color afterwards as shown in the video below.
Then layer some colors in the cup and then flip the cup upside down onto the canvas so that the canvas holds the paint.
Now you can slightly lift the cup and drag the cup on the surface of your canvas or just tilt the canvas so that the cup automatically slides across the painting surface over the negative space. The pressure of the paint will slightly lift the cup and let some of the paint flow over your canvas.
Negative Space With Double Swipe Technique
In this tutorial, you will see that you can use a solid element such as a smooth trowel, spatula, etc to help slide the paint over the canvas.
In the following video, you can see that the artist decided to implement the double swiping technique; which is nothing more than adding two focal points of color on the canvas and swiping the color over the canvas.
When you decide to implement this technique, you need to make sure that you add the colors one above the other on the canvas and not all together. And once you've added the first focal point blend, you use a hard smooth surface the paint in one direction.
For the second color focal point, you use a different direction. So when you tilt the canvas to expand the strokes, you get a contrast in both colors and direction.
Acrylic Pour Funnel Drag On Black Negative Space
The funnel technique will be very useful to achieve more defined lines than those you get with an open cup. However, the goal is very similar.
You press the outlet of the funnel on the canvas previously prepared with the base, and inside of the funnel you add the mixture of colors. Then you start dragging the funnel across your canvas in different directions at the same time that you slightly lift the funnel to let some of the paint flow out from the bottom.
Once you have the layout you must resort to other techniques such as Blowing, Airbrush or Dutch to spread your paint.
String Pull Acrylic Pour
Without a doubt, one of the best techniques to use on a negative space acrylic pour is the string pull. The string allows us to move our colors on the canvas to make beautiful flowers, feathers and other beautiful shapes.
Once the base is prepared and the rest of your colors chosen, you must take a clean rope, string or chain and cover it with paint. Then you will place the string on your negative space, define a direction, and drag the string.
The intention is to drag the colorful paints through your negative space with your string.
Here are 2 videos that show the string pulling technique on a negative space.

Need to keep track of your recipes and techniques?
Check out the "Painting Diary" Printables!
The Beauty Of the Negative Space Acrylic Pour
Although I have shared 14 tutorials for the use of negative space, it does not mean that they are the only ones. In fact, if you decide to combine several of them, you may come up with more interesting results.
I know from experience that in art we are free to experiment and create. So feel free to experiment with new tools and techniques.
And if you make a mistake, or you feel that an area of the canvas does not look very good, use the color of the negative space to cover it up.
Remember, we usually screw things up at first, but it's colorful and fun. So enjoy the process and sooner rather than later, you will achieve the results you are hoping for.

